This article shows you how to use Azure Data Factory to copy data from on-promise SQL server source to an Azure SQL database destination.
Prerequisites
Before you begin this tutorial, you must have the following:
- Azure Subscription, if you don’t already have an Azure subscription, create a free account.
- On-premises SQL Server database: You can use SQL Sever Management Studio(SSMS) or Azure Data Studio to create sample database.
- Azure SQL Database: If you don’t have an Azure SQL database, see Create a single database in an Azure SQL Database article for steps to create one.
Steps:
1. Creating a sample table an on-premises SQL Server database and Azure SQL database. There are several ways to connect to the SQL server. In this tutorial, I am using SSMS to connect both the on-premises and Azure SQL server database. Here, I assume you have successfully connected both on-premises SQL Server database and Azure SQL database.
1.1 Creating a sample table an on-premises SQL Server database
In this step, we will create a sample table called ‘orders’ in the EverestCycleStores database and will put a few records into it. We will use this sample data as a source to copy data into the Azure SQL database. The below SQL scripts are used to create orders table and insert sample data into it. The created table is shown in figure 1.1.
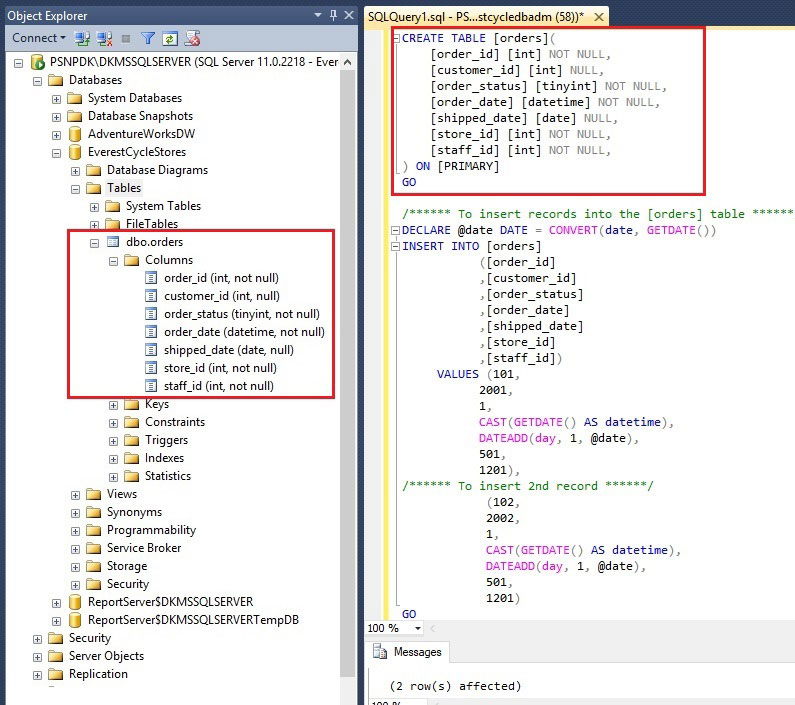
Figure 1.1: Creating a table on-premises SQL server database
1.2. Creating a sample table an Azure SQL database
Similarly, we will create a sample table called ‘orders’ in the az-sqlserverdb database where we’ll copy data from on-premise SQL server database source. The table script and created table shown in figure 1.2.
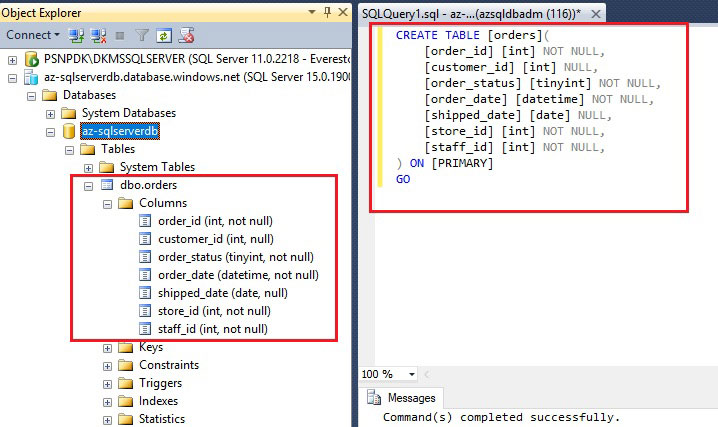
Figure 1.2: Creating a table in the Azure SQL database
2. Building a Basic Azure Data Factory Pipeline
Now, we have an on-premises SQL database with sample data in the order table and Azure SQL database with the order table where we will copy data from the source.
In this step, we’ll learn how to copy data from an on-premises SQL Server database source into an Azure SQL Database using Azure Data Factory(ADF) user interface (UI). Follow the below steps to create an ADF v2.
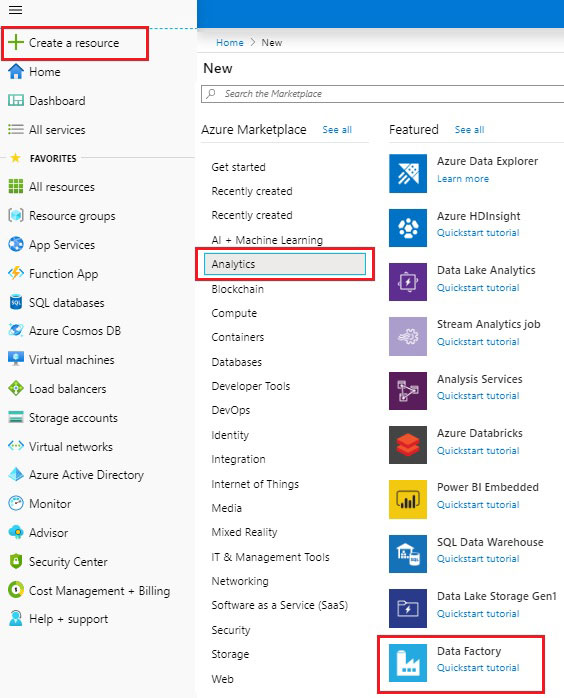
Figure 1.3: Creating a new Data Factory
2.2. On the New data factory page The configuration of the data factory shown in figure 1.4. Follow the below steps and click the Create button once the configuration has been completed.
- Enter the ADF’S name in the ‘Name’ box.
- Select a version as ‘V2’.
- Select your Azure Subscription.
- For Resource Group, do one of the following steps: o Select Use existing, and select an existing resource group from the list. o Select Create new, and enter the name of a resource group.
To learn about resource groups, see Using resource groups to manage your Azure resources.
- Select a location for the data factory.
- Select Create.
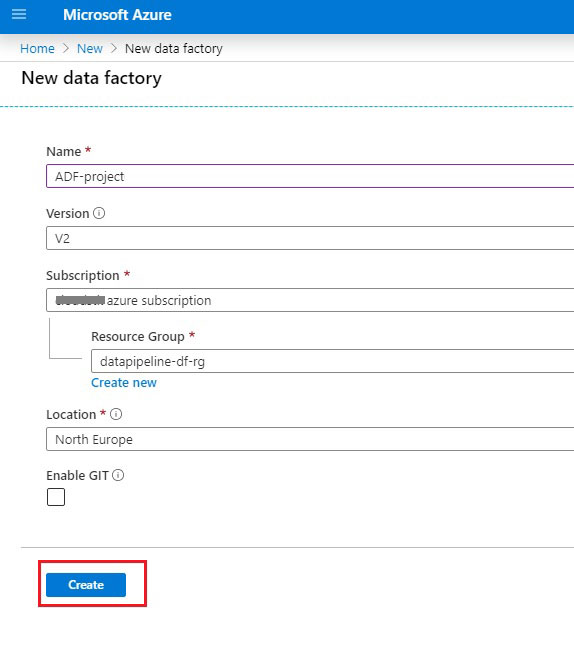
Figure 1.4: A new Data Factory configuration
After the creation is complete, you see the Data Factory blade as shown in figure 1.5. Select the Author & Monitor tile to start the Azure Data Factory application on a separate tab. 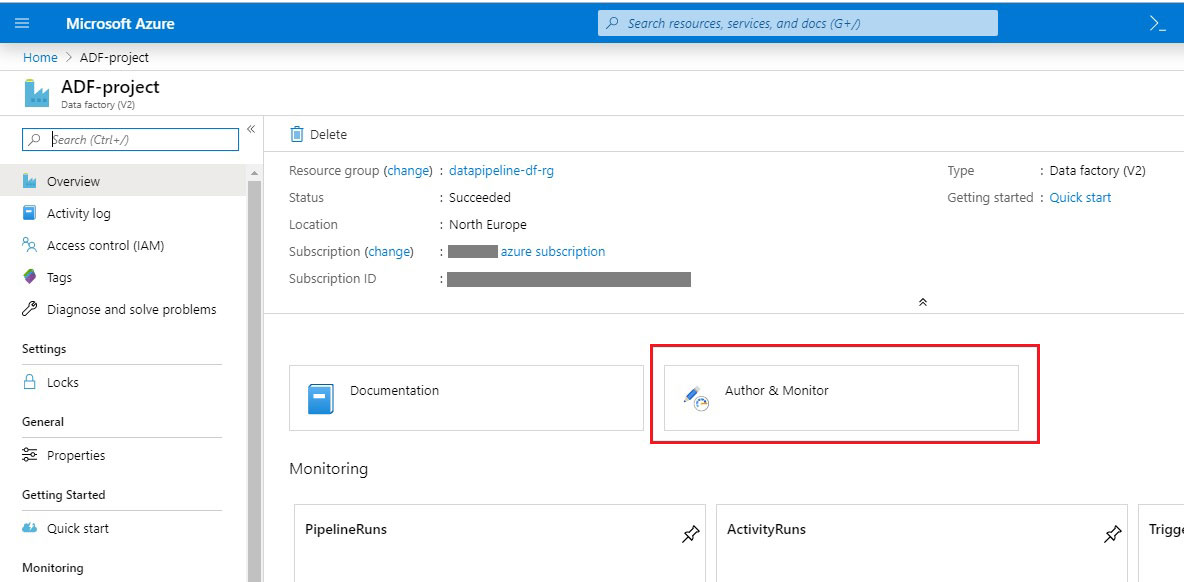 Figure 1.5: Click on the ‘Author & Monitor’ to start the Azure Data Factory user interface (UI) application. When we click on Author & Monitor, the factory’s object creation blade opens, as shown in figure 1.6. In this tutorial, we use Azure Data Factory Copy Wizard to copy data from an on-premises SQL instance to Azure.
 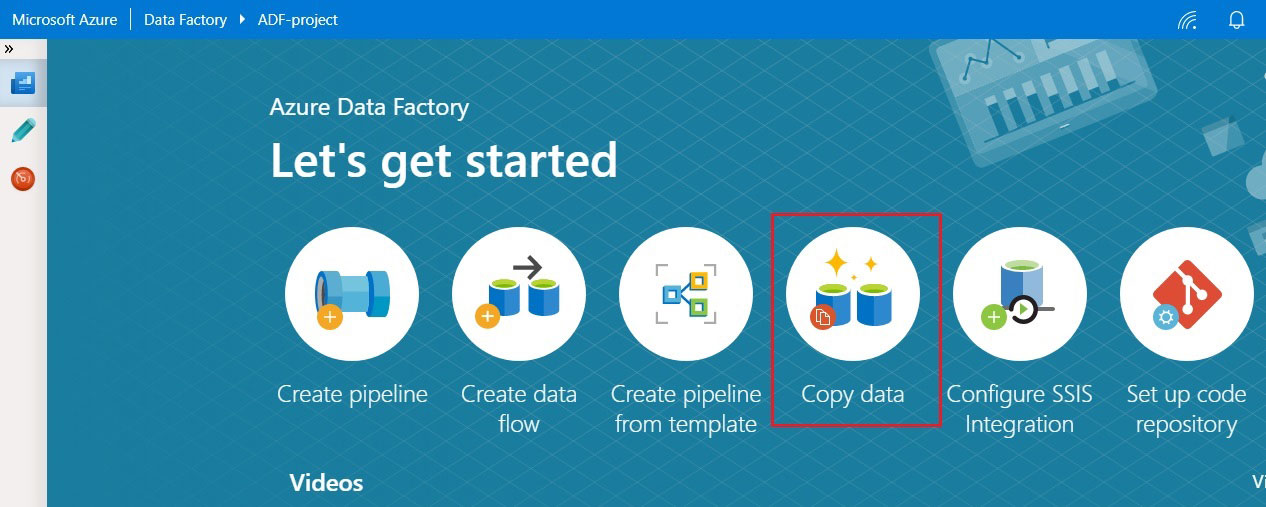 Figure 1.6: click Copy data to launch the Copy Wizard. On the Let’s get started page, Click on Copy data to launch Copy Wizard. You will see the Copy data configuration page as shown in figure 1.7 where you can configure the copy data process.
In the Properties page:
Enter the Task name and description for the copy data task and specify how often you want to run the task, and then click Next.
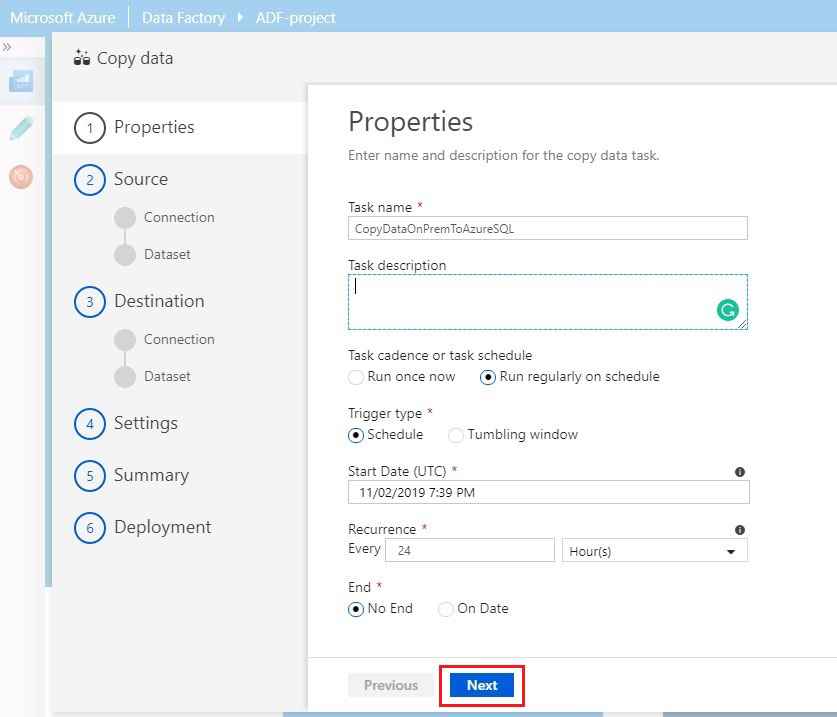
Figure 1.7: Enter the Task Name, Description and schedule attributes of the process.
Source data store
On the Source data store page, click Database tab, click the Create new connection
On the New Linked Service page, select SQL Server, and then select Continue.
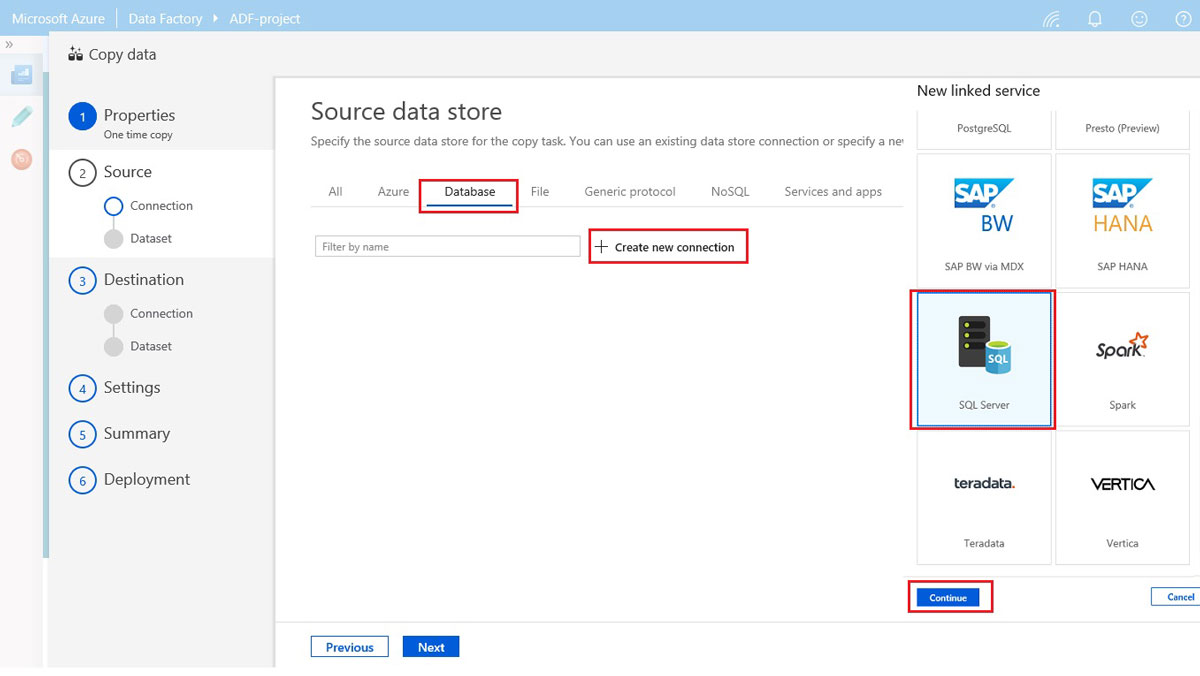
Figure 1.8: Source data store connection for the copy task.
Now, enter ‘SqlServerLS’ as the linked server’s name and fill in ‘Server name’, ‘Database name’ and the credential fields for the source Azure SQL database and leave all other fields as is.
Here are the steps to set up this source:
On the New linked service page, enter the linked server’s Name and then click +New link in the Connection via integration runtime as shown in figure 1.9
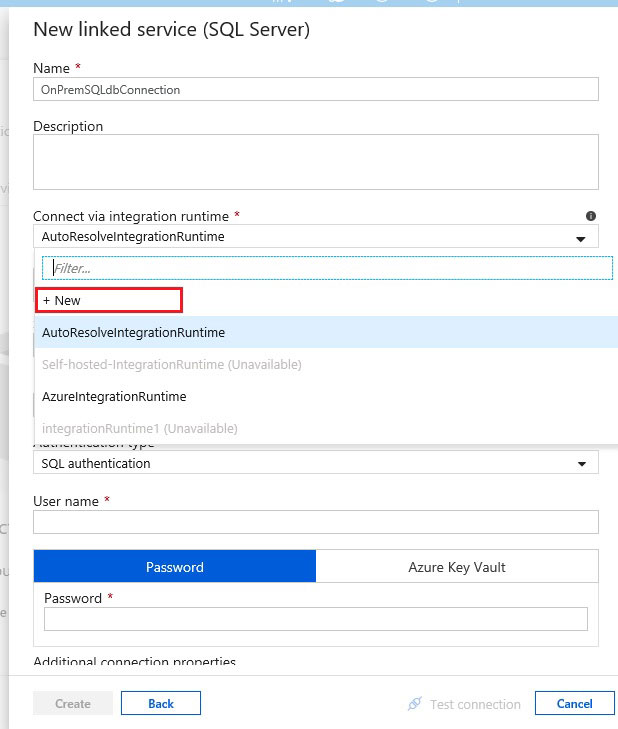
Figure 1.9: Click +New to connect via self-hosted IR
Self-Hosted Integration runtime setup
a) When you click on +New link, then it will open the Integration Runtime Setup page.
b) Select the Self-Hosted button and click Continue.
c) Enter the IR Name and then click Create.
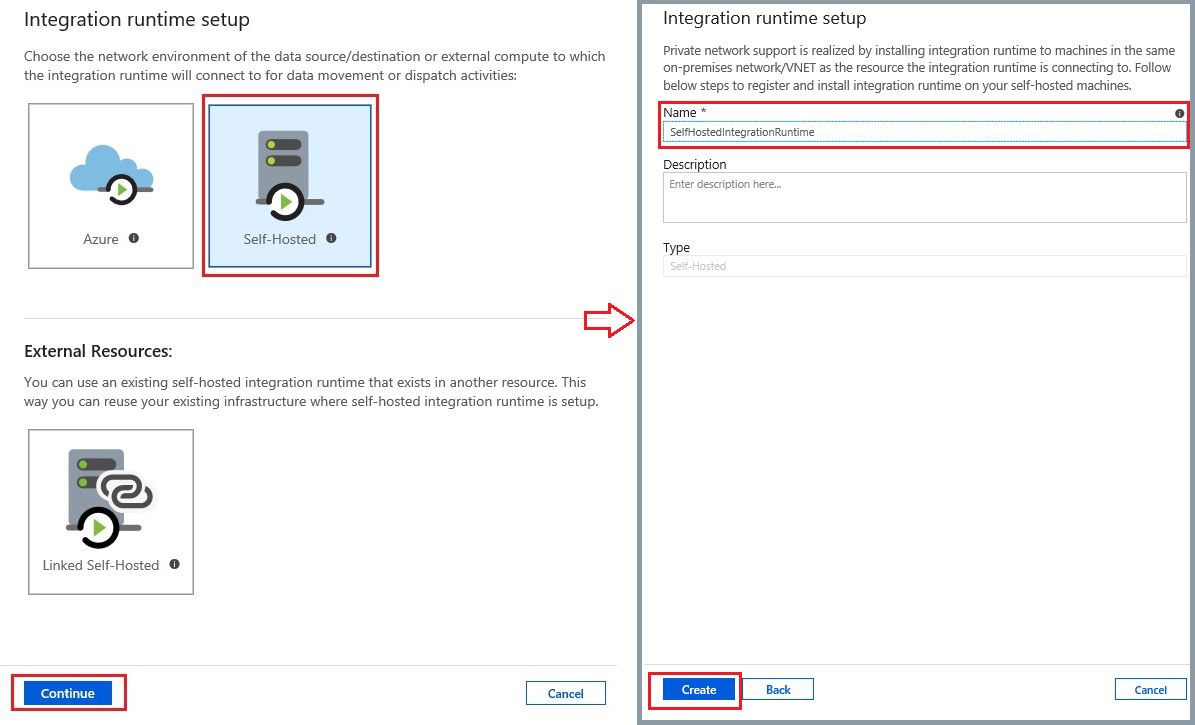
Figure 2.0: Self-Hosted Integration runtime setup
To configure the Self-hosted integration runtime on your local machine, you can choose between an Express setup or Manual setup. The following instructions are based on Manual setup:
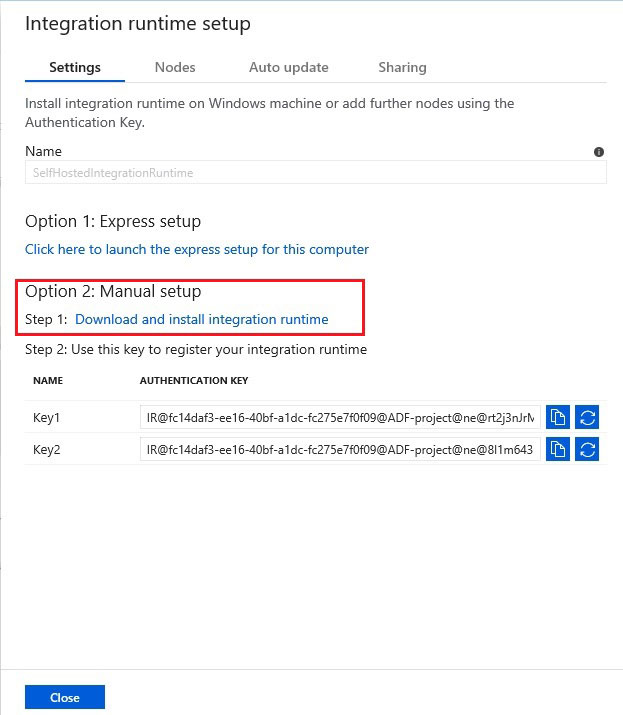
Figure 2.1: Installing integration runtime on the Windows machine.
Manual installation and configuration of ADF Integration Runtime: Copy and paste the Authentication key. Select Download and install integration runtime.
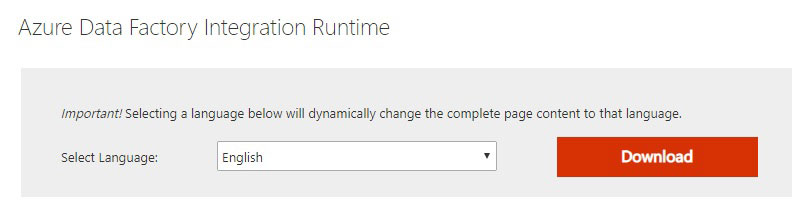
a) Download the self-hosted integration runtime on a local Windows machine. Run the installation and follow the installation wizard instructions.
b) On the Register Integration Runtime (Self-hosted) page, paste the key you saved in the previous section, and select Register.
c) On the New Integration Runtime (Self-hosted) Node page, select Finish.
When the self-hosted integration runtime is registered successfully, you see the Microsoft Integration Runtime Configuration Manager on your local computer, as shown in figure 2.2.
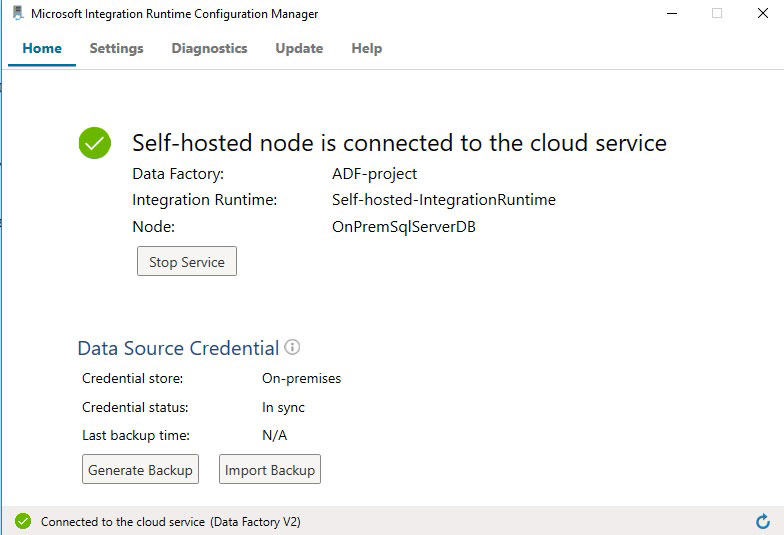
Figure 2.2: Self-hosted integration runtime configuration status.
More info: Create self-hosted integration runtime.
Here, the below figure 2.3 shows the connection to a local database which has been tested and connected successfully. You can test the Database connection in the Diagnostics tab from the Microsoft Integration Runtime Manager (see Figure 2.2).
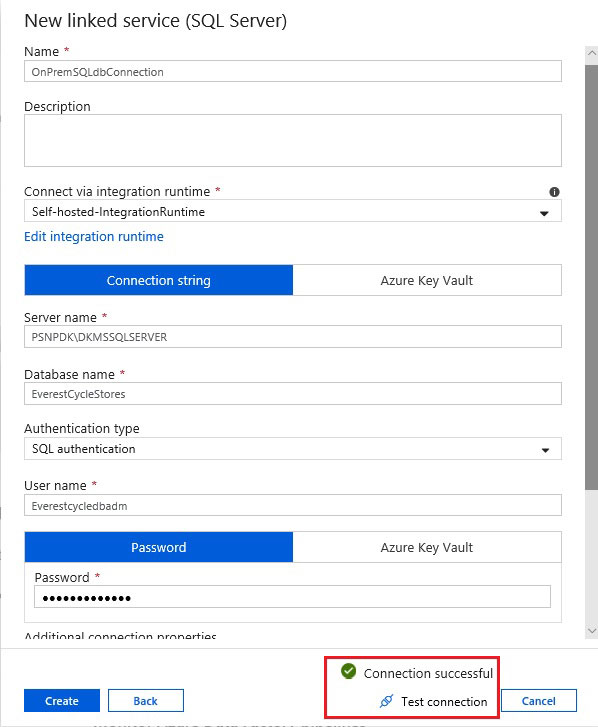
Figure 2.3: Testing source SQL server connection from the ADF.
Destination data store
a) On the Destination data store page, click Azure tab and click the Create new connection
b) On the New Linked Service page, select Azure SQL Database, and then select Continue, as shown in Figure 2.4.
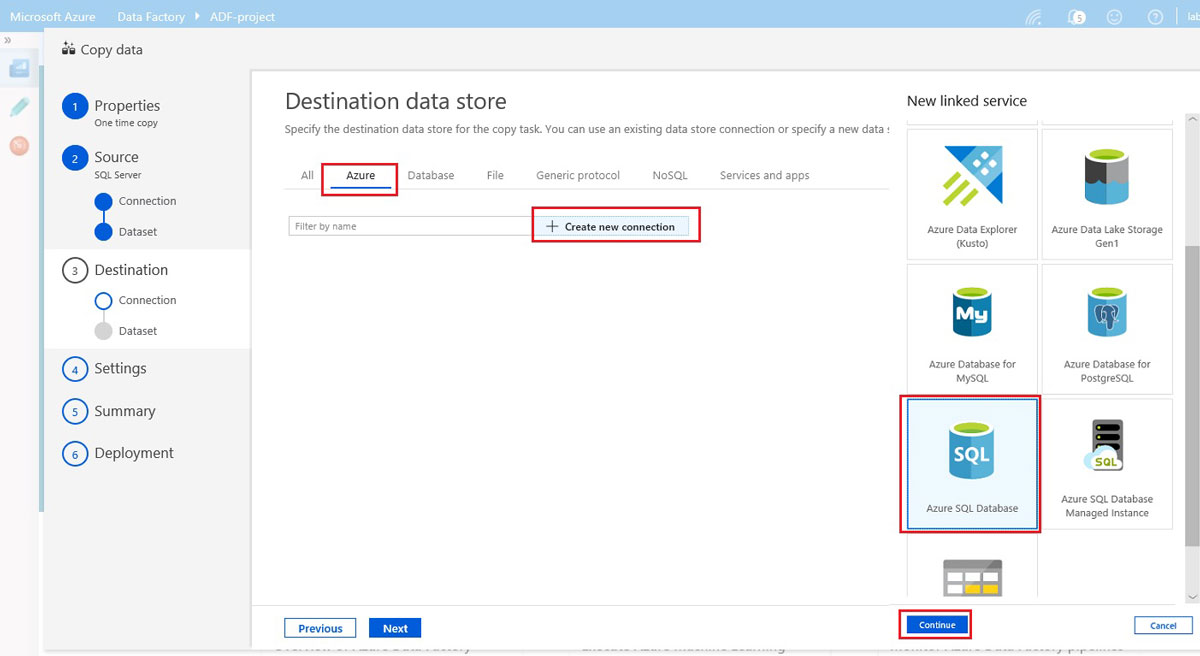
Figure 2.4: Destination data store connection
Now, we will configure the New linked service for Destination data store:
a) On the New linked service page, enter the linked service’s Name and option description.
b) Select the AutoResolveIntegrationRuntime from Connection via integration.
c) Select your Azure subscription.
d) Select Server name and Database.
e) Enter User name and Password.
f) Click Create.
You can test database connection by clicking the Test connection.

Figure 2.5. The destination Azure SQL Database configuration
Table mapping
a) On the Table mapping page, select the orders table as our destination, the one we created earlier in step 1.2.
b) Click down arrow to see the schema and to preview the data.
c) Click Next to continue the configuration process.
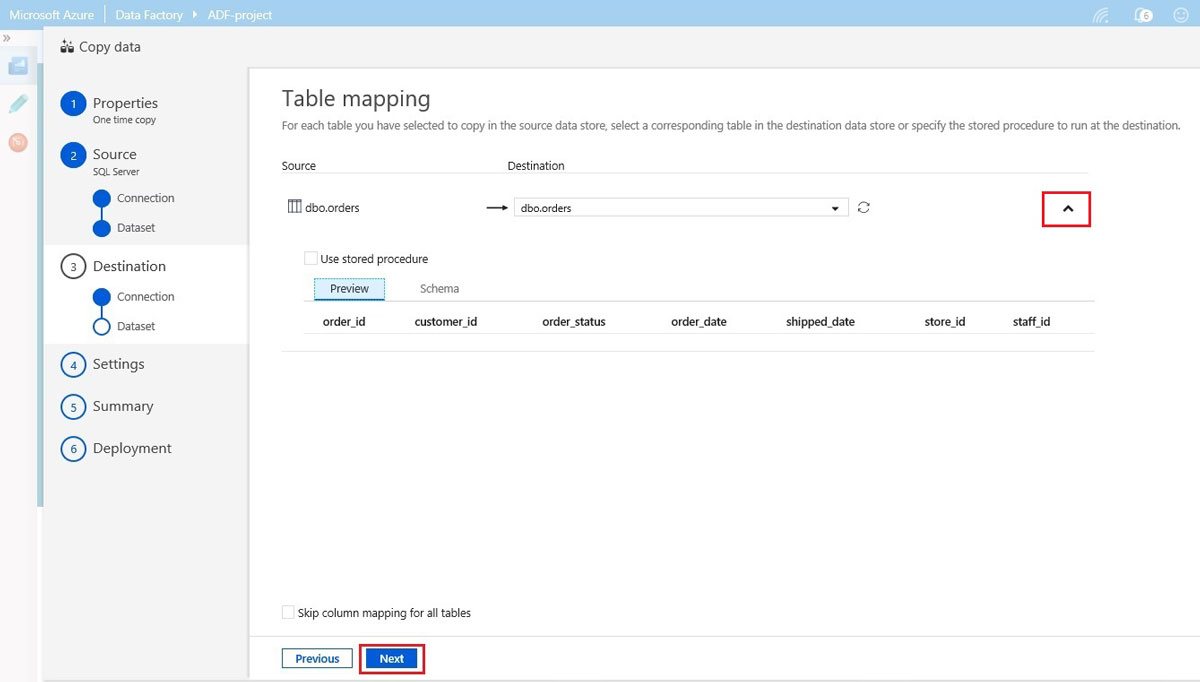
Figure 2.6: Table mapping between the source and the destination
Column mapping
a) On the Column mapping page, map the source and destination columns.
b) Click Next to continue.

Figure 2.7: The source columns mapping to target columns.
Setting page
a) On the Setting page, you will see the options to set Fault tolerance and Performance settings. We’ll keep the default options now, as shown in figure 2.8.
b) Click Next to continue.
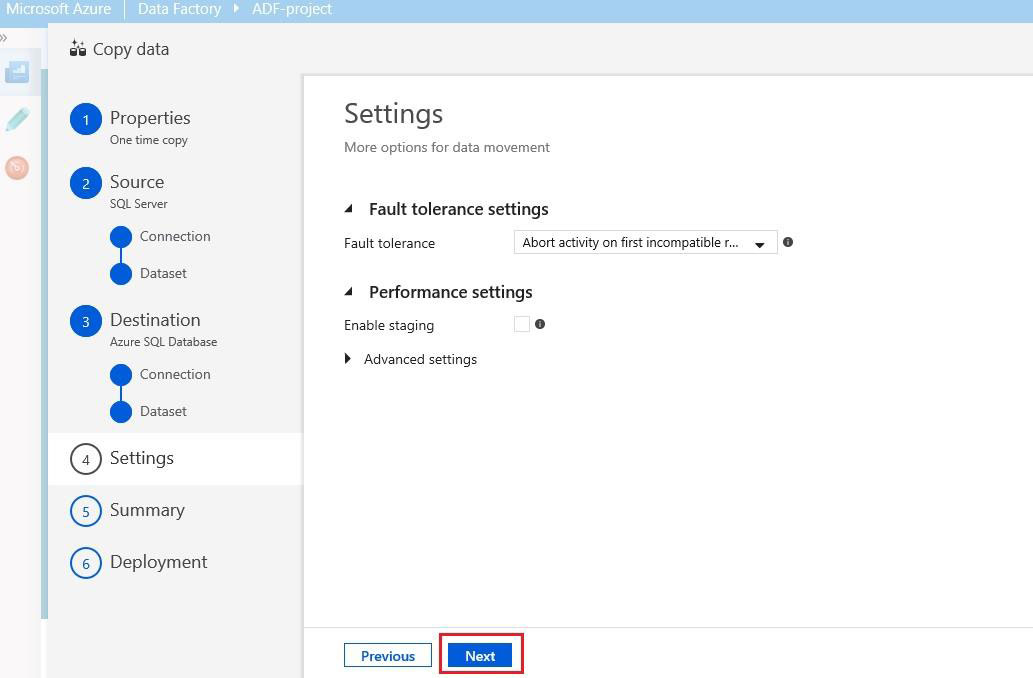
Figure 2.8: Setting page to set fault tolerance, leave default for now.
Summary page
a) Here, we can see a summary of all the configurations that we have done.
b) Review information in the Summary page, and click Next to deploy the Copy Data pipeline.
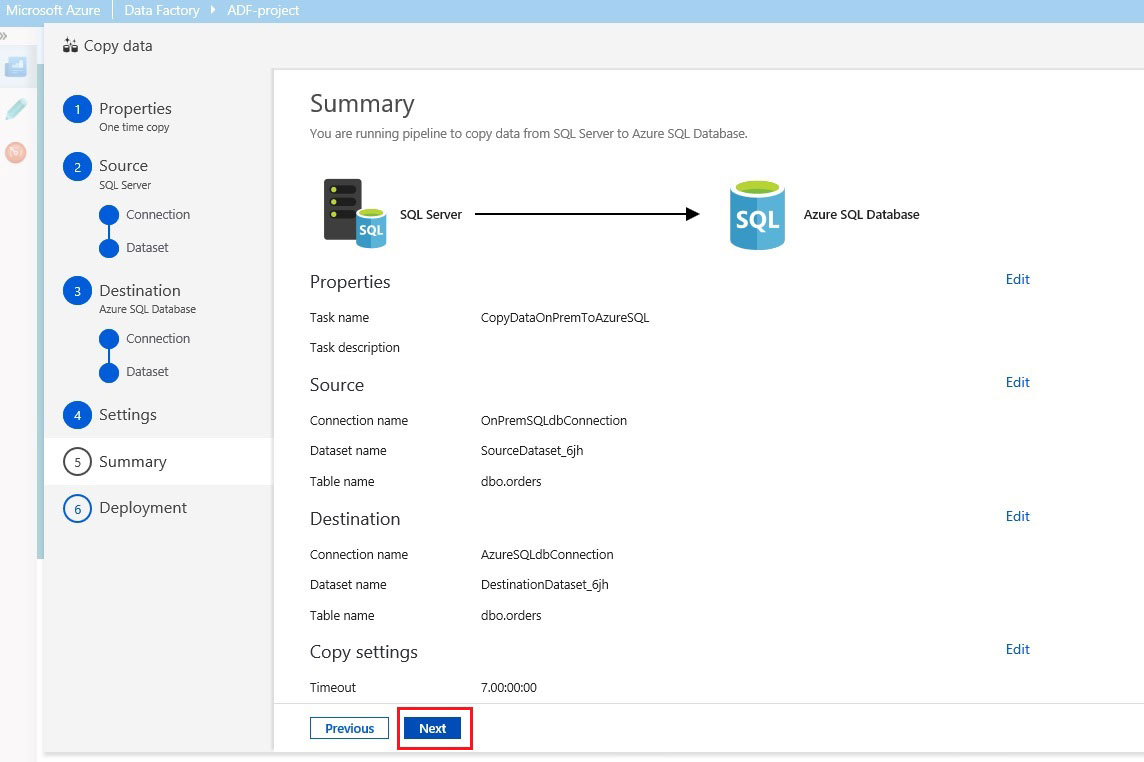
Figure 2.9: Summary of copy data configuration.
Edit pipeline and Monitor
On the Deployment page, Click on Edit pipeline to review the artifacts created by Azure Data Factory.
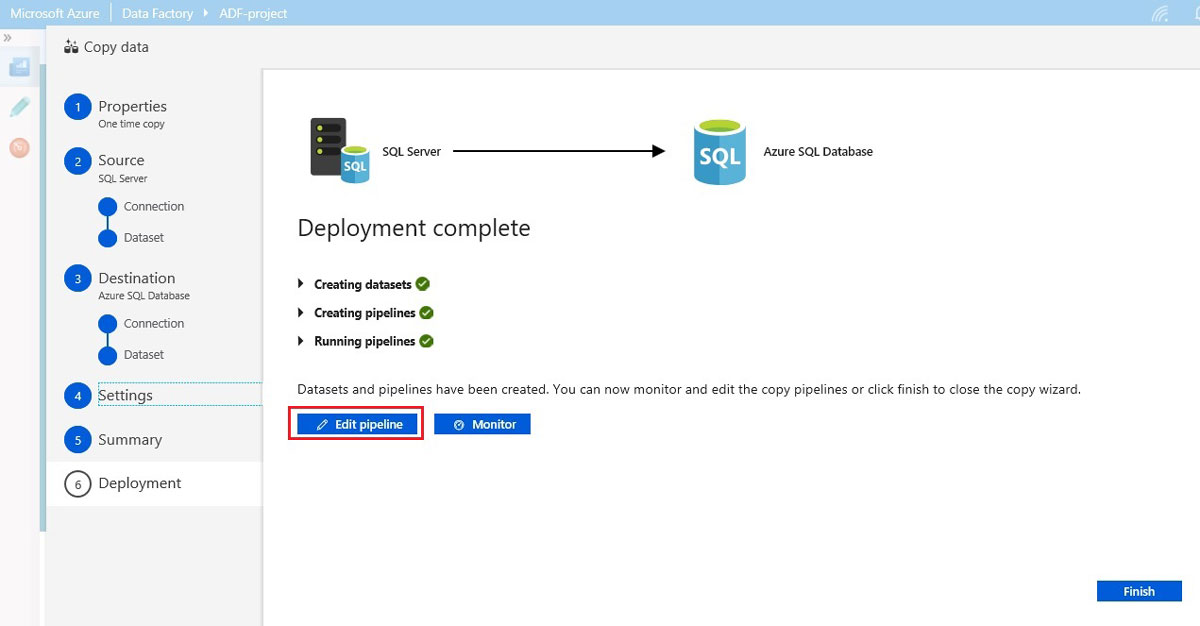
Figure 3.0: Click on the Edit pipeline to review and run the pipeline.
Azure Data Factory Pipeline Components
You can see the Factory Resources – Pipeline, Datasets
Select the pipeline we have just created to run the pipeline manually.
- Click on Debug button, it will begin to run the pipeline. When it has completed successfully, you can see the Succssed status. Click the eyeglasses icon to see more details, as shown in figure 3.2.
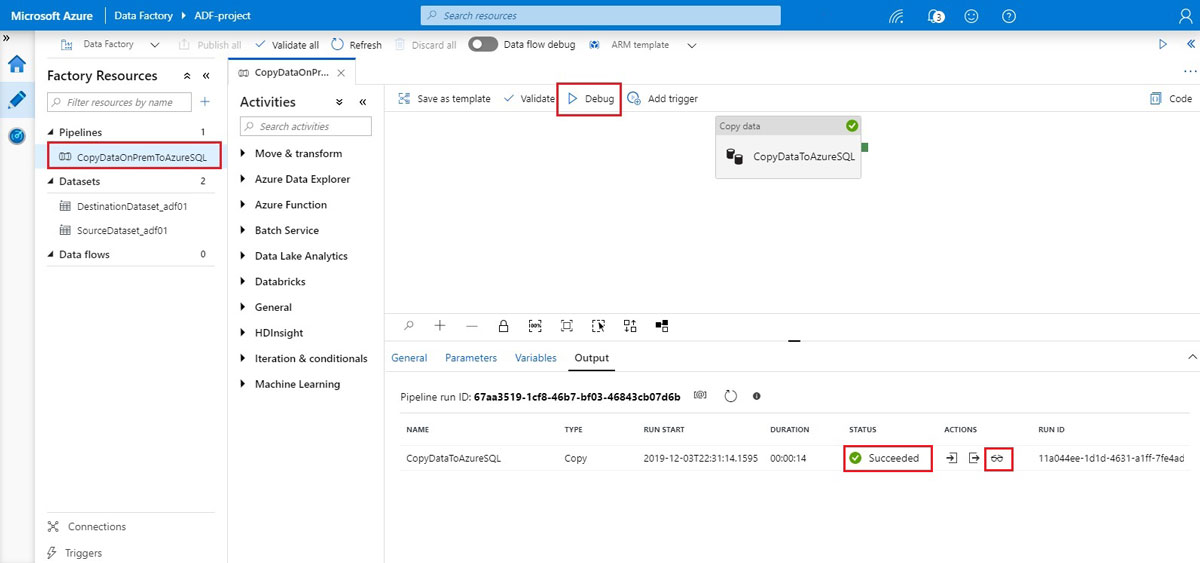
Figure 3.1: Azure Data Factory Pipeline Execution.
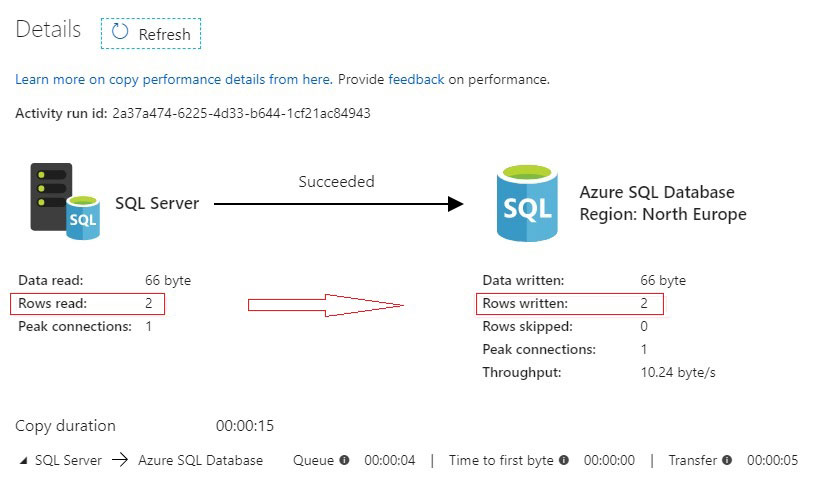
Figure 3.2: Copy data performance details
In this article, we have created an Azure Data Factory pipleline to copy data from on-permises SQL Server to Azure SQL Database. We have looked at Self-hosted integration time to connect on-permises SQL Server instance and an Azure SQL database as a destination data store in a copy operation. Finally, we have executed an Azure Data Factory Pipeline successfully and we have seen the data copied from the source to the target database successfully.


0 Comments